

ONE ROOM CHALLENGE
Welcome to week three of The One Room Challenge! During the course of this project, I will be making over my guest room. The room is a little boring and not quite ready for guests. During the course of this challenge I will be creating a neutral and relaxing retreat for visiting friends and family.

THE PROJECT PLAN

I will finish this project over the course of the next three weeks. The updated project plan by week is as follows:
- Week 1 – Complete the design plan and begin ordering furniture
- Week 2 – Add a feature wall using board and batten
- Week 3 – Paint feature wall
- Week 4 – Paint the existing dresser and install new hardware; start painting trim and doors
- Week 5 – Paint windows and hang curtains; finish painting trim and doors
- Week 6 – Add remaining decorative elements and make the bed
WEEK THREE | GETTING STARTED
In week one I introduced you to our project plan. In week two we installed the board and batten to the feature wall behind the bed. This week we painted the feature wall. I was hoping to get the trim and the doors painted as the entry door currently does not have a door handle. We are holding it closed with a screw. I know, very classy.
You can read the previous posts by following these links:
Here is a view of the room before we started this week:
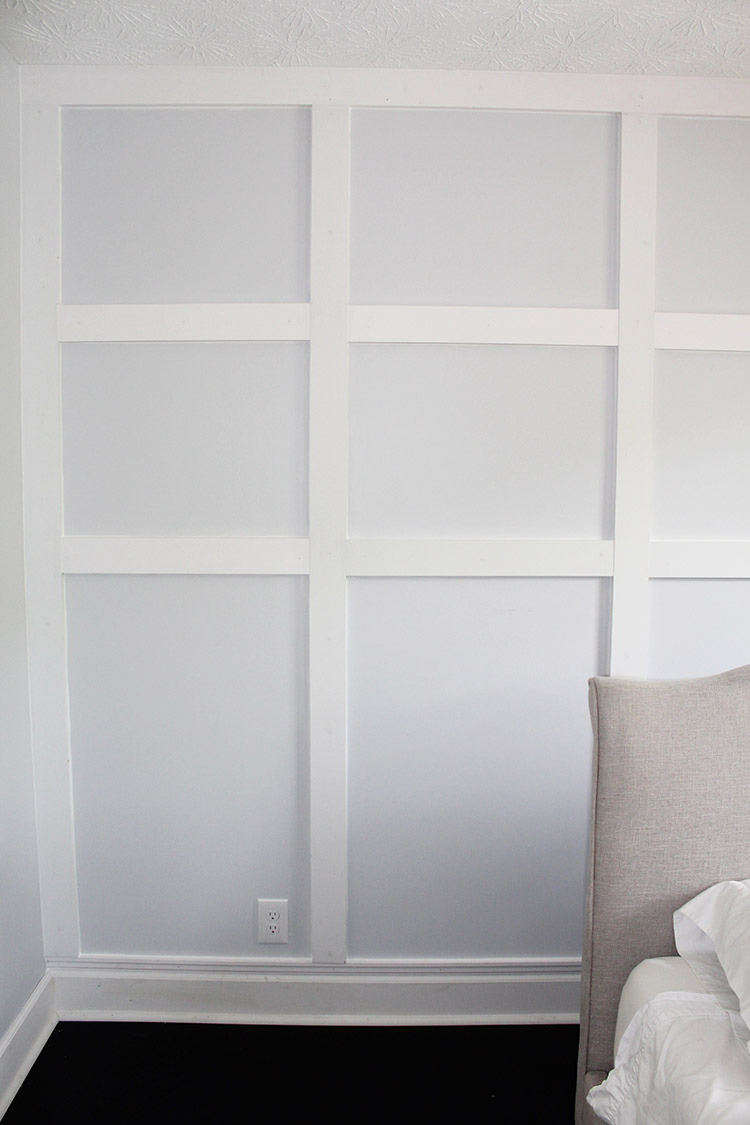
Let’s talk about this week. We are a little bit behind as the feature wall took a bit more time than anticipated. As I mentioned above, we have not finished caulking or painting the rest of the base boards, area around the doors, or painting the doors themselves. I don’t think this will be an issue as I can get some of this done next week when I makeover the dresser and week five when I paint the windows. Worst case scenario, week 6 is scheduled for just pulling the decor together. There will be time to finish up painting if needed.
Painting the Feature Wall
The supplies I needed were as follows:
- paint ($35 a gallon)
- light weight spackle ($4.28 for an 8 oz tub)
- 180 grit sanding block ($3.97 each)
- 60 grit sanding block ($4.67 each)
I also needed paint brushes, smooth paint rollers, a rolling pan, painters paper to protect the floors, a plastic drop cloth to protect the furniture in the room, and a step ladder to reaching the top of the wall. I already had these items on hand.
We needed to finish prepping the wall for painting. I caulked around the edge of each piece last week, but I still needed to fill in the nail holes. I used a small amount of light weight spackle to fill each hole. I waited about an hour, as per the package instructions, before sanding. I used a 180 grit sanding block over each hole to smooth any rough spots created by excess spackle.
The next step was to clean. It is important to start with not only a smooth surface, but a clean one. If not, all of that debris will get in your paint and it will memorialize on your walls forever.
After removing all of my sanding dust, I put down my painters paper along the edge of the wall. I also got all of my materials together and got started. 
It took about 90 minutes to get the first coat up on the wall. The husband and I alternated sections. I cut in around all of the boards using the paint brush in the first section. He rolled the top of each board and the center of each square using a smooth foam roller in the third section. He rolled after I cut in. This allowed us to work in tandem without getting in one another’s way.
Here is a shot of the room after the first coat:
The puppies were curious about what we were doing. They left and went to take a nap after they realized we weren’t eating anything. 
THE REVEAL
We ended up needing three coats of paint. I believe the issue was going from a gray wall to a white wall. Although the gray wasn’t a dark color, it was still dark enough to keep peeking through. If we ever decide to paint the entire room white, I am going to start with a proper Kilz primer.
Overall, I am very happy with how the room is progressing. The feature wall looks amazing! The room feels brighter with the big white wall.

Here is a photo of the wall with the bed put in place. The temporary night stand is just visiting and actually belongs downstairs in my office. The linens on the bed are temporary as I don’t want to put the new linens on the bed until all of the painting is done. 
PROJECT SPEND

Let’s talk about spend. I am watching project costs and I am trying to pull this room together for less than $1,000. Project costs are starting to mount up, so it is going to be close.
In week two we spent $185.95 for the ceiling fan and the materials to build the wall.
- The materials for the feature wall included nine 1×4 boards at the price of $6.98 each and one piece of decorative trim for the transition from the baseboard for about $12. The total cost was $80.02
- The ceiling fan total cost was $105.93
In week three we picked up some supplies in order to paint the feature wall Expenses for the week totaled $47.92.
- paint ($35 a gallon)
- light weight spackle ($4.28 for an 8 oz tub)
- 180 grit sanding block ($3.97 each)
- 60 grit sanding block ($4.67 each)
Total project spent to date: $233.87
I am really looking forward to how great this room is going to look once everything is done! Come back next week to see the makeover of my old dresser for the room.
Wish to see more? Check out the One Room Challenge Featured Designers.
ONE ROOM CHALLENGE™ FEATURED DESIGNERS

Apartment 34 | Beginning in the Middle | Coco & Jack | The English Room | The Gold Hive | Gray Malin | Jenna Sue Design | Jojotastic | Kelly Rogers Int. | Linda Holt | Marcus Design | Michelle Gage | Natasha Habermann | The Painted House | Rambling Renovators | Sacramento Street | Shannon Claire | Sketch 42 | Stephanie Kraus | Bisou Style

[…] Week One | Week Two | Week Three […]
[…] One | Week Two | Week Three | Week […]